Interview System
The Interview System makes client intake easier and results in the gathering of essential information during the first contact with the client. The system comes with a set of questions and advice that are linked to words, problem codes, special problem codes, and national index codes but you can add your own. The questions can have Programmed Responses, which depend upon the client’s answers. The Interview System is best understood by looking at its parts: Interviews, Questions, Advice, and Management
Interviews
The client or another person can be interviewed
- i) If the interviewee is the client, the interview begins immediately
- ii) If the interviewee is another person, contact information is entered and a conflict check can be done
The basics of an Interview
- i) Consists of Questions, Advice, Programmed Responses, and Comments
- ii) A staff member has many options. They can stay with one list, or select only certain questions, jump to a new list or ask custom questions
- iii) Comments are allowed on each question and the overall interview
- iv) The interview is saved and can be printed and/or added to case notes
Questions
Questions are added to a pool, so any single question can be used anywhere
Questions are tagged as having a particular type of answer
- (a) Memo
- (b) Date
- (c) Dollar Amount
- (d) Yes/No
- (e) Number
- (f) Letter
A question can be part of multiple lists of questions. A question list is associated with one of four groups:
- (a) LSC Problem Code - Example: 37 Domestic Abuse
- (b) Specpcode, a subdivision of the LSC Problem Code – Example: 6300 Landlord/Tenant Lockout.
- (c) NatIndx code, used to markup pages for statewide legal aid web sites – Example: 1630307 Guardian Ad Litum
- (d) Custom List, e.g., Receptionist’s Questions
When doing an Interview, you pick your list of questions by selecting it from one of those four groups.
Programmed responses allow you to ‘prompt’ the advocate or interviewee to do something
- (a) A programmed response is possible for all question types, except memo
- (b) It pops up an instruction, depending on the interviewee’s response
- (c) The interviewer can comply with the instruction or say why they didn’t
- (d) For example, if the client is asked if ‘they have a safe place to stay’ and they answer ‘no’, the interviewer should give them a list of shelters with phone numbers and make the call for them
Custom Questions
- (a) Include both the Question and the Answer in the Memo Answer field.
- (b) Maintenance reports allow reviewing Custom Questions to see if they need to be made into formal questions
- (c) For example, Custom Questions keeps containing the question about food stamps, a new food stamps question should be added to the pool.
Advice
Issues and Advice are added to a pool, so any single Issue and Advice can be used in multiple places
Advice can be linked to multiple groups, groups are based on three codes
- (a) By LSC Problem Code
- (b) By Specpcode, a subdivision of the LSC Problem Code
- (c) By the NatIndx code, used to markup pages for statewide legal aid web sites
When doing an interview using a list of questions linked to one of the above codes, the Applicable Advice tab shows the advice linked to that code
Users can look up advice on any other topic they desire
Pushing a button adds the Advice to the comments section of a question’s answer.
Management
Add questions, link them to codes, order them and build programmed responses
- (a) Add an unlimited number of questions
- (b) Link them to any topic under any of the four groups
- (c) Pull up the group and change the order of the questions to fit your preferences
- (d) Build programmed responses, so the staff member is prompted when a certain answer is entered to a particular question
Add custom list, put questions in the list and order them
Add issues and the advice to deal with the issue, then link them to codes
Print reports about overall interview usage (not just for one case)
- (a) Error reports
- (b) Lists of tables
- (c) Usage reports of questions
- (d) Lists of questions based upon group
- (e) Lists of advice based upon group
Starting or Editing An Interview
Before investing time in setting up an interview, it would be a good thing to make sure that it does what you want it to do. To understand that, it would be useful to see how it works so you can understand its potential and see if it would work in your office.
Interview System Use
The Interview System is located on Intake Page 2 of the Client Intake

Click on Start-Edit Interview to start a new interview. This presents the user with five tasks they can perform:
- 1) Start a New Interview
- 2) Resume an Old Interview
- 3) Show Old Interviews on Case
- 4) Relate Other Interviews to a Case
- 5) Print List of Interviews on a Case

Start A New Interview
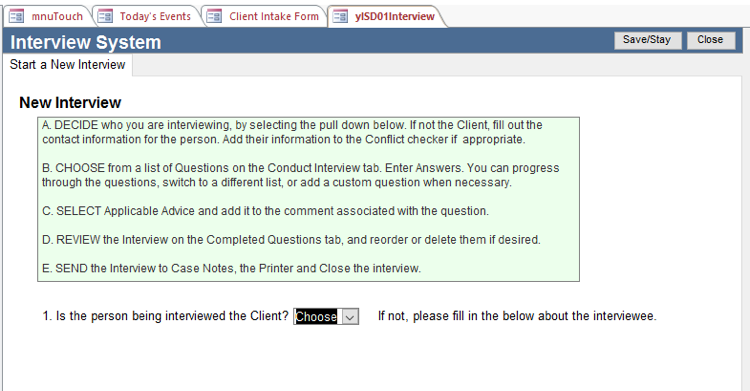
Let’s start an interview. Make sure you first read the instructions for performing a new Interview
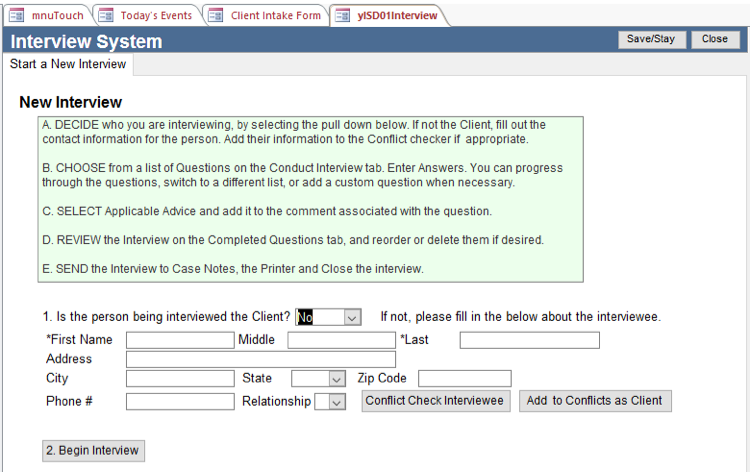
- 1) Decide who you are interviewing. If the person being interviewed is not the client, you are prompted to enter contact information. Conflict Check Interviewee before starting. Push the Add to Conflicts as Client if appropriate. Media:Int3.png thumb|none
- 2) If the person being interviewed is the client, select yes from the pull down and it will immediately take you to the Conduct Interview screen. Media:Int5.png
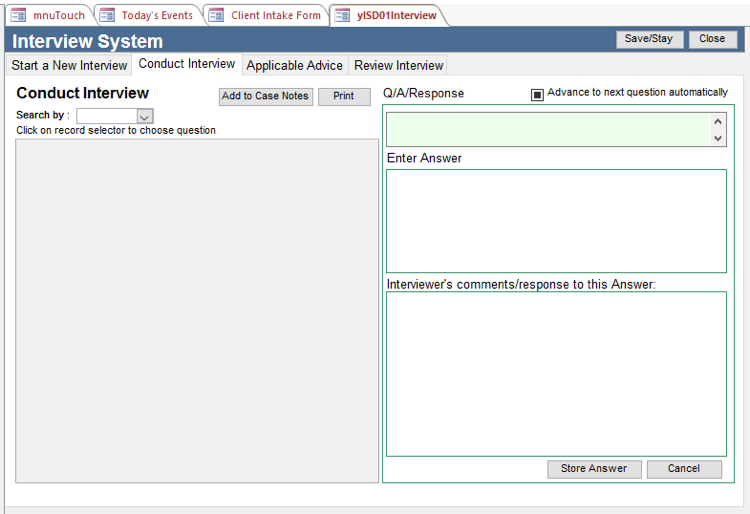
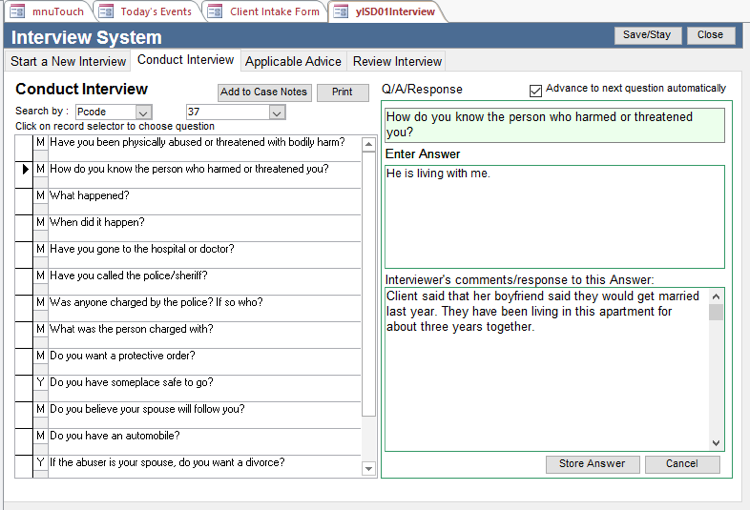
- 3) The Conduct Interview tab is where the user starts asking questions. First they search for a list of questions. The Search by pull down allows them to search for questions by word, problem code, national index code, special problem code, or a custom list.
- i) Let’s first search for questions based on Problem Code 37 (Domestic Abuse)
- ii) You can search for questions based upon
- (a) Pcode (problem code)
- (b) Special Problem Code (your division of the problem code)
- (c) National Index code (used to markup web sites)
- (d) A Custom List (such as Receptionist or Consumer)
- (e) Word in the Question, for example ‘custody’
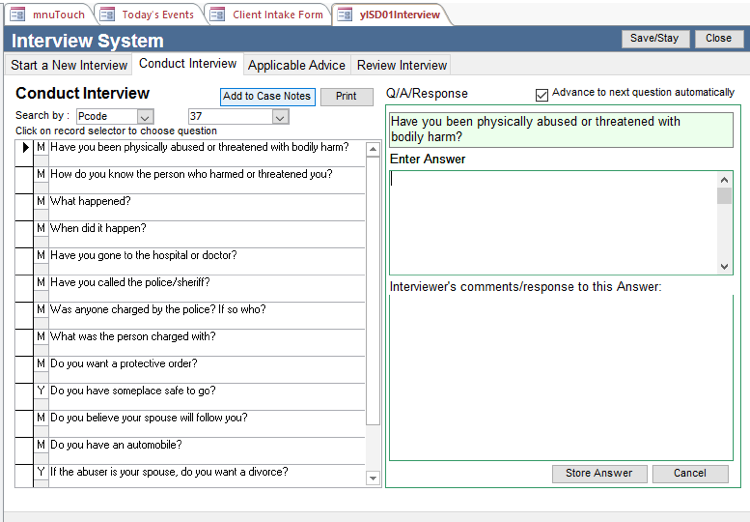
- iii) Here we:
- (a) Choose Pcode
- (b) Select 37, Domestic Abuse
- (c) Click the Advance to next question automatically box
- (d) Click on the first question so it appears in the green box
- iv) As you select a question, it appears top right in the green box Media:Int6.png
- v) Enter the client’s answer in the Enter Answer section and any comments in the Interviewer’s comments/response to this Answer: section.Media:Int7.png
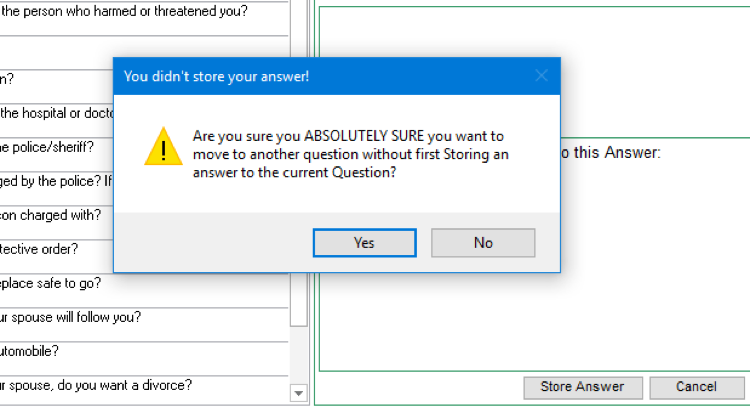
- vi) After each question is answered, you press Store Answer to save the answer and proceed to the next question. You can skip questions, but you will be asked if you really intended to.Media:Int8.png
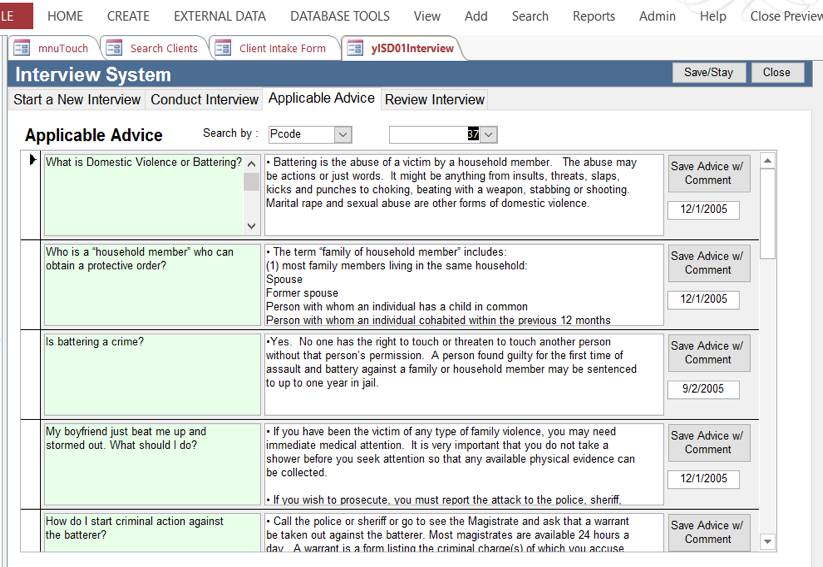
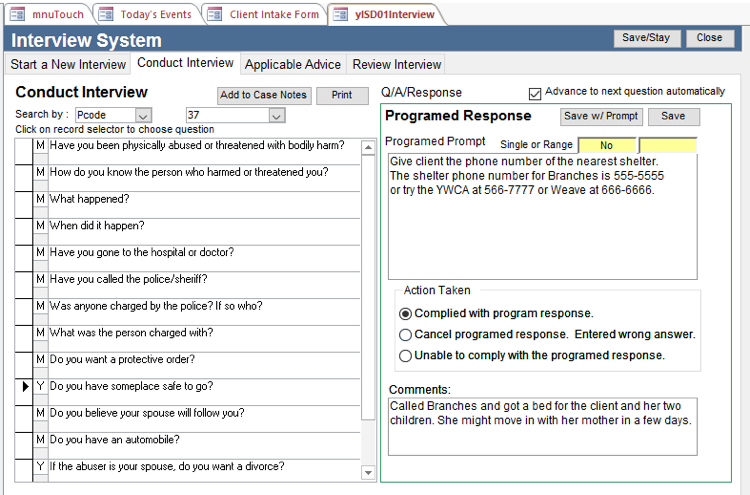
- vii) Sometimes you will reach a point where you want to give specific advice to the client. Here the client didn’t know they could go to the police. We press the Applicable Advice Tab. It displays the advice for that type of problem. You can use the Search by fields on this tab to look for advice and information on any type of problem. Media:Int9.png
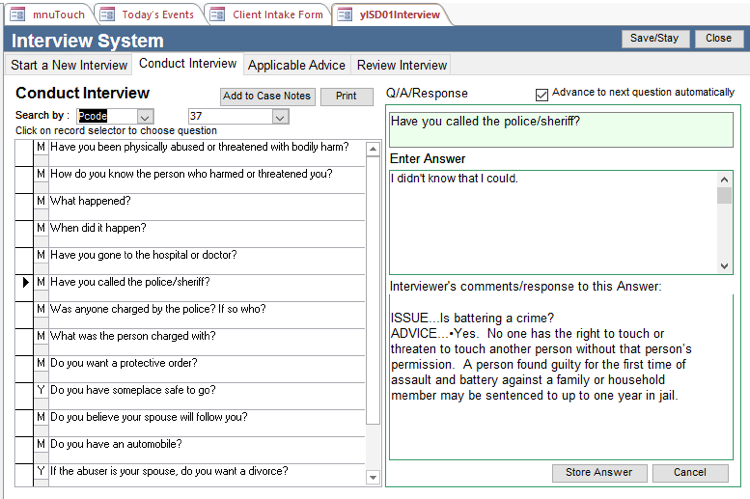
- viii) We can give them the advice about whether battering is a crime and press the Save the Advice w/ Comment button to make it part of the interview.Media:Int10.png
- ix) You can also prompt the client or the intake person about what to do if they get a certain answer to a question. This is known as a Programmed Response. Below, we see the question about a safe place to go. If the client answers No, a programmed prompt appears and gives instructions to the intake person. They then enter if they complied with the instructions.Media:Int11.png
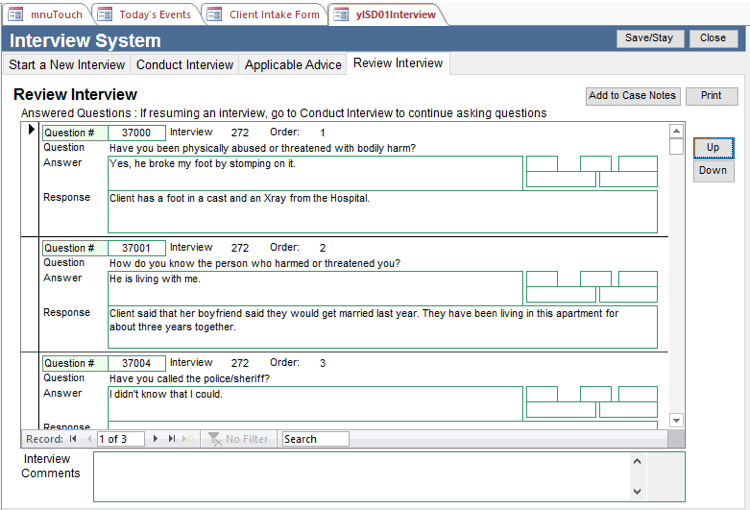
- x) At the end of the interview, or whenever desired, the user can click on the Review Interview tab to review the questions and answers. You can reorder the questions and answers to make more sense if you need to. Media:Int12.png
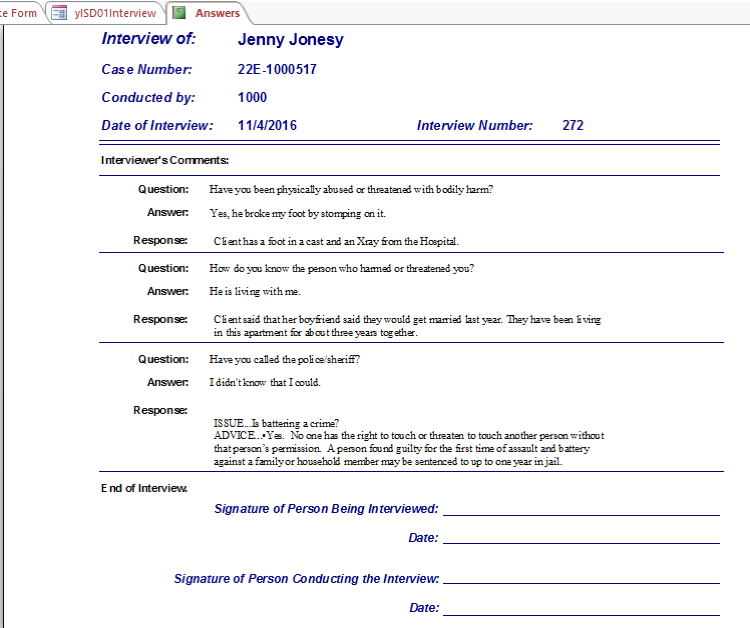
- (a) Pressing the Print button prints the Interview and provides a space for the client and the interviewer to sign. Media:Int13.png
- (b) Add to Case Notes puts the interview into the client’s case notes. This isn’t necessary unless desired, since the interview is stored in the Interview tables. Media:Int14.png
Resume An Old Interview
This is not shown, since it is similar to conducting a normal Interview. The user selects the old interview and is taken to the Review Interview tab so they can review what was already asked. They can then go to the Conduct Interview tab to ask more questions from whatever list they select.
Show Old Interviews on a Case
Clicking on the Show Old Interviews on a Case button displays a pull down with the list of old interviews that apply to the case.

This includes interviews from other cases related to this case. This review sheet shows the question, answer, and interviewer’s comments.

Relate Other Interviews to This Case
A user may wish to relate an interview with another client to this case. For example, the client has a divorce and this is a landlord tenant case. You may wish to relate the interview from the divorce. You might want to relate the interviews with another tenant from the same apartment complex.

Print List of Interviews on This Case
The user can also print a list of all the Interviews on this case

Setup
Some initial investment of time is essential. The System includes over 800 questions, over 800 pieces of advice, and over 150 programmed responses. However, these may need to be made state specific. They might also be on topics you don’t need
Management
1) Management – The Interview Management requires administrative rights and can be accessed by going to Admin Setup Functions Interview System. This is where you are presented with the simple Manage the Interview System screen that allows you to work with Questions, Custom Lists, Issues and Advice, and overall reports.

Add/Edit Questions

- i) The Add/Edit Questions button brings us here. First we select a list of questions based upon Problem Code, Specpcode, NatIndx Code, or Word. If you are going to add a new question, use the Word choice and search to see if the question is already in the System.
- ii) If you want to add a new question, click on the arrow asterisk button at the bottom of the screen. This allows you enter a new question by entering the answer type (yes/no, memo, etc.), the question, and a unique number. The unique number isn’t significant, as long as no other question has it. You might use a range of numbers to mean different things, such as coming from your office, a particular unit, etc.
- iii) To associate a question with any of the groups on the right, first click on the record selector next to the question (here the white arrow on a black background).
- (a) Pcodes – 1 to 99
- (b) Specpcodes – 100 to 9999
- (c) National Index Codes – 1010000 to 1999999
- If the question was already in the system, it will show what codes it is currently associated with. Pull down the combo box of the code or list you want to use and make your selection. The question will then be associated with that list or code. To delete a mistake, highlight the code and press the orange Delete button.
- iv) Once you’ve built a new list or added to an old one, go to the Reorder the Questions tab. Click on a question and press the Up or Down button to change the order in which it is asked. Be sure to save your set up when done.

- v) Add Responses to Select Questions - Here is where we can attach programmed responses to questions. These are prompts that come up when a question is answered a certain way. We’ll see this on the Interview later. This programmed response works when the client says they don’t have a safe place to go. The interviewer is prompted to provide a list of shelters and their phone numbers.

- vi) Reports - This is the area where you can get print outs and reports that will help you when working with questions. For example, you can print a list of your Specpcodes for reference when linking questions to codes. Let’s print out the list of questions under problem code 1, Bankruptcy.

- Notice that the list shows the question, the order it occurs, the type of question, and the linkage to not only the selected problem code, but the other Specpcodes and NatIndxes

Set Up Custom List
The next thing you might want to do is to build a Custom List of questions. There could be a list for the receptionist, the intake unit, etc. The interface is similar to the one for questions associated with Pcodes, etc. Click on a list and the questions that are part of that list will show up on the right
To add a new list, click on the arrow pointing to the asterisk and put in the necessary information
To add a question to your list, search for it above the list of questions, click on the record selector next to the question, and then push the Add Question button.

Once you’ve selected all the questions for your list, you need to order them. Go to the Reorder Questions tab. Select the list you want to work with and the list of questions will appear. Highlight the one you want, then choose the Up or Down arrow to change the order in which it appears. Be sure to save your resulting setup by pressing the You Must Save button.

You may want to print out your custom lists for review by you or others. You can do this from the Reports Tab. Let’s look at the testList1 list.

Note the printout shows the question that is associated with the list and the other codes the question is associated with.

Enter Issues and Advice
Add and Edit Advice is the area where you can add issues and the advice to answer them
Much like the other tabs, clicking on the record selector shows the codes the advice is associated with
Adding a new issue and advice is as easy as clicking on the arrow with an asterisk, then putting in the issue, the advice, any comment and the date the advice was added
[[File:Int29.png|thumb|none]
You can now go to the Reports for Advice tab to print out the advice you have associated with a particular code

Note the Problem and Advice show up with the code you selected AND all the other codes the advice is associated with.

Choose Reports
Choosing Reports from the main Manage the Interview System screen provides you with these overall reports.

Let’s look at the Interviews by Advocate for a period of time you enter.
