Texting Using Prime 16
Have the need to send text messages to your clients from case management? Prime 16 can do it. Utilizing the technological capabilities of Venture Technologies and Twilio, Prime 16 now supports sending text messages to your clients and tracks those messages.
If your client doesn’t want to receive messages, all they have to do is text back a single word and Twilio prevents them from receiving texts. If they want to receive text messages again, they can send another single word and receive text messages again.
With technology provided by Venture Technologies, additional features include being able to review the status of the message as reported by Twilio (QUEUED/SENT/DELIVERED) and being updated when clients opt in and out.
The ability to send text messages is just one more of many, many improvements in Prime 16.
Send Client A Text Message
Open any client record. Make sure the client has a cell telephone number entered and marked as "Okay to Text".

Click on the "Send Text" button.

In the texting page, you will see the client's cell number in the top left and their case number in the top right. These are shown to ensure you are texting in the right case--and because these entries will be used to save texts sent to the client within the client file.

Use the Quick Entry to choose a phrase that may be repeatedly used by your organization.

Here, the first quick entry was chosen. For many quick entries, you may wish to leave spaces where information needs to be filled in. In this example, we presume an organization has many offices with different phone numbers. We have left the telephone number off, so it would need to be entered.

Text messages are limited to 160 characters. Once you have entered your text message, press the "Send Message" button to send the text. (If you decide not to send a text message, you can press the "Cancel/Close" button.)

After pressing "Send Message", you should receive a box telling you the text message is queued: "Message Sent! Twilio responded with: 'queued'"

The "queued" status merely means that Twilio has gotten the text you want to send and is in the process of sending it. Press Ok in this box to close it, then press the "Cancel/Close" button in the Text window to return to the client case.
The "Cancel/Close" button operates to cancel sending a message and close the text form if you have only entered a message but not sent it. If you have already sent the text message, it merely closes the form. Once a text message is delivered to Twilio and you get the "queued" status message, you cannot cancel sending the text. Much like a cell phone, when you press "Send Message" then message is already en route and cannot be canceled.
Reviewing Texts Sent On A Case
To see what texts have been sent in a case, open the case file and click on the "Texts" button.

Texts that have been sent in the case are then displayed.

As you see, the system displays the message sent, together with the time and date it was sent, and phone number to which it was sent. (For clients that change numbers, the numbers texted may differ from text to text.)
Finally, you can, for each message, press the "Message Status" to get the status of the text message.
Reviewing Text Message Status
Within the text message form, press the "Message Status" to get the status of a text message.

The typical flow of message status is "queued", followed by "sent", followed by "delivered".

The "queued" status is merely the time that Twilio accepted your message. "Sent" means the upstream carrier has accepted the message request. And "delivered" means Twilio has received confirmation of message delivery from the upstream carrier, (and, where available, the destination handset).
Add or Modify Text Quick Entry
To add or modify text quick entry, navigate to Admin-->Setup Functions-->Setup Tables. In the Setup Tables form, double-click on "Twilio Text Quick Entry".

You can modify existing entries or add new entries to this list. Please bear in mind that text messages are limited to 160 characters.
Incoming Calls and Texts/Client Interaction
Please note: Incoming calls and texts to your Twilio text number are not presented to staff within Prime. Rather, a generic message is spoken (if a voice call) or texted (if a text message) to the person.
If a client texts to the Twilio phone number, Twilio queries your system requesting instructions on what it should do. Prime responds with information entered in the Twilio setup under "Text Response".

The response text is returned to Twilio and then sent to the client as a text message.
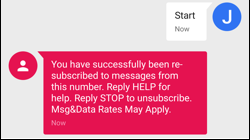
If a client texts “STOP”, “CANCEL”, or “END” back to the number, Twilio sends that notification to your system to indicate that cell number no longer wishes to receive text messages. This will uncheck the checkbox on the client records that match that cell number. Twilio also blocks the attempt to send text messages to that number again and the client is notified of that:


If the client decides later they do want to receive text messages, they can text “YES” or “START” to the number. Twilio sends that notification to your system and updates the checkbox indicating it is okay to text to that number. Twilio will start allowing texts to that number again.

If a client calls the Twilio phone number, Twilio queries the Venture Technologies website requesting instructions on what it should do. The website queries Prime for the information entered in the Twilio setup under "Call Response".
Twilio then speaks that message to the client.
Twilio Texting Setup
Start at the main Twilio web site: https://www.twilio.com
You will also need the Twilio setup page within Prime: Admin-->Texting Setup This is the Texting setup page in Prime:
![]()
Within the Twilio web site, click on the Sign Up button at the top right.
![]()
Enter your account information using your own name, email address, and password.

Enter a phone number where they can text you a confirmation code to verify your account.
![]()
Enter the confirmation code.

Enter a project name. [Make sure you are not setting up a trial project. You may, depending on how you started the account process, need to upgrade your account. That typically includes entering a credit card for payment.]

Purchase a new phone number.
![]()
Use the phone number they provide or choose to search for a different number.
![]()
Ultimately, they should tell you your new number. Put that number in the Twilio # in the Twilio Setup page in Prime.
![]()
Click on the home button.
![]()
Click on project settings.
![]()
Copy the SID and Auth Token from the webpage into the Twilio setting page of Prime.

In the phone number settings in Twilio, enter the Voice and Messaging settings.

If you are a hosted user of Prime (on Venture), Kemp's Case Works staff will provide information on these entries (e.g., https://AGreatOrganization.Org/text/VoiceMessage.ashx or TextHandler.ashx)
With the phone number entered before, your Twilio setup page in Prime should look like this:
![]()
The Status Callback entry in the Twilio setup page in Prime uses the website address of your Twilio web system. If you are a hosted user of Prime (on Venture), Kemp's Case Works staff will provide information on this entry. If you are self-hosted, your IT personnel will have to provide that information. Ultimately, the page called 'SMSMessageStatus.ashx' is what should be in this field. (e.g., 'https://AGreatOrganization.Org/twilio/SmSMessageStatus.ashx')
Requirements
Users of Prime 16 on Venture do not need to meet any additional requirements. All requirements are met within the hosted version on Venture. An account with Twilio, together with a number assigned by them, and the ability to send and receive texts and phone calls at that number, is required to send text messages. Services provided by Twilio do involve a separate cost and are not covered by Venture, KCW, or your use of Prime.
Outside of the options available within the Prime frontend, the system is NOT modifiable by the organization. Any desired modifications to its operation must be provided by KCW staff. In a self-hosted environment, in addition to the requirements of Prime 16, the following additional requirements must be met:
- Access 2010, 2013 or 2016
- SQL 2008 R2 or SQL 2014
- Server 2012 R2 capable of running ASPX websites with:
- IIS
- ASP
- .NET 4 properly installed and registered